Royal Coachman Wet
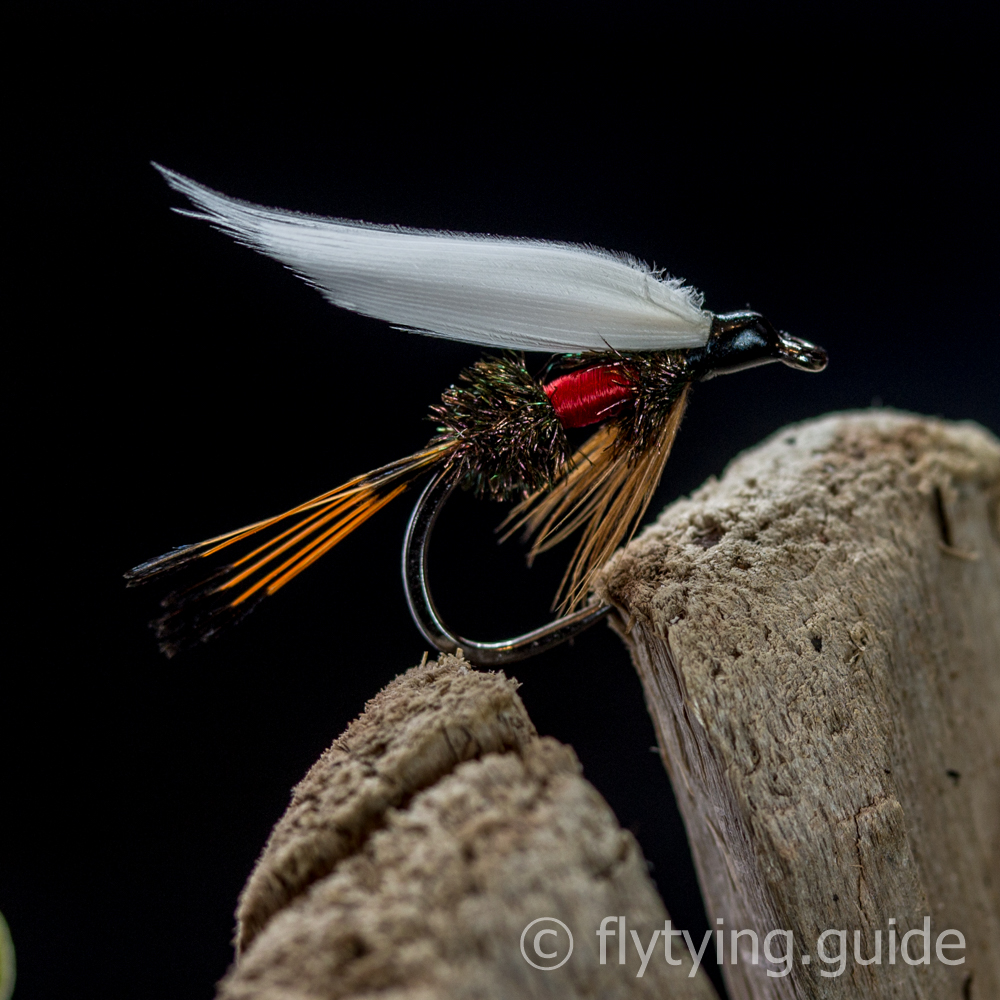
The royal coachman line of flies are some of the most recognizable flies out there. A tippet tail and red tag in the middle of the peacock herl gives the fly its distinctive look. The wet fly has a down wing made from a matched set of white quills. This version of the fly has been tied based on the Bergman plates.
- Source: Ray Bergman
- Submitted By: Fly Tying Guide
Materials
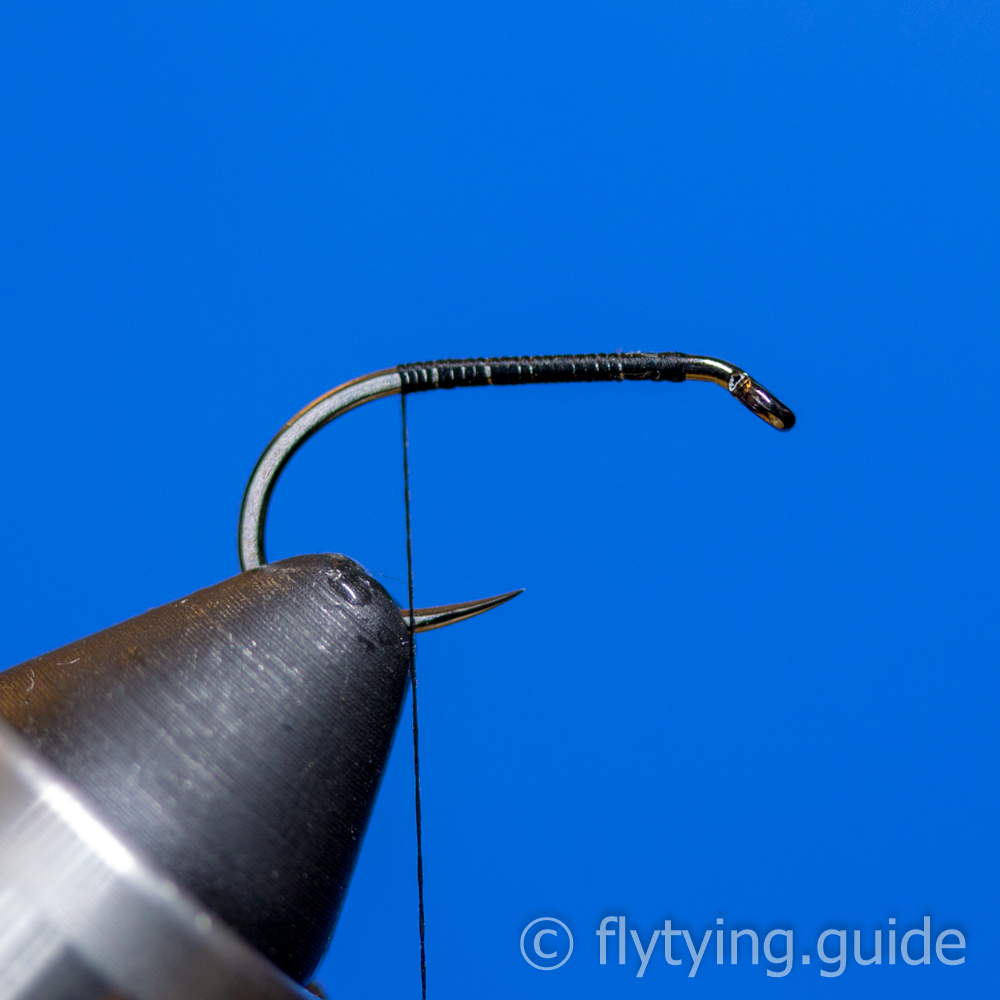
1
Place the hook in the vise and secure the thread behind the eye. Cover the hook shank with thread to the start of the bend, opposite the barb.
2
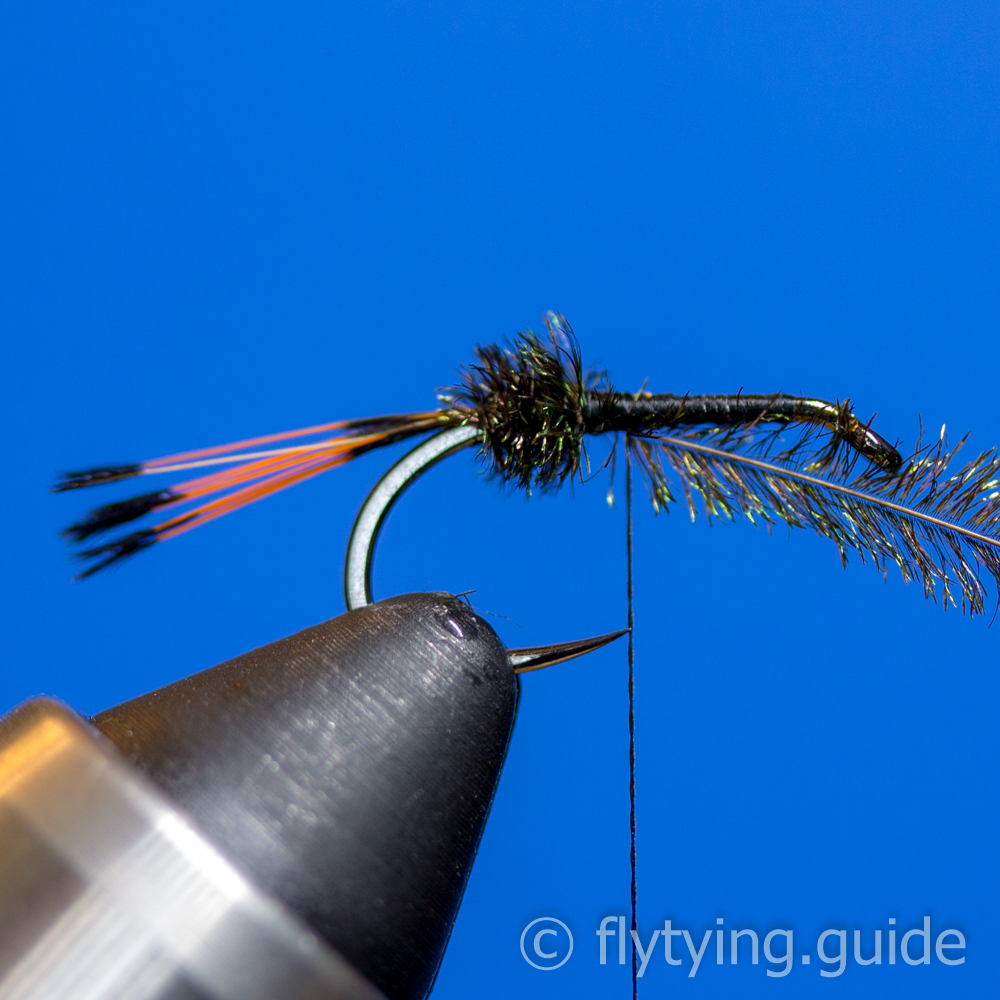
Prepare the tail by removing 5 or 6 tippets from a feather, keeping the ends aligned. Measure the tail to be one hook shank in length and tie in at the start of the bend. End with the thread near the tie in point.
3
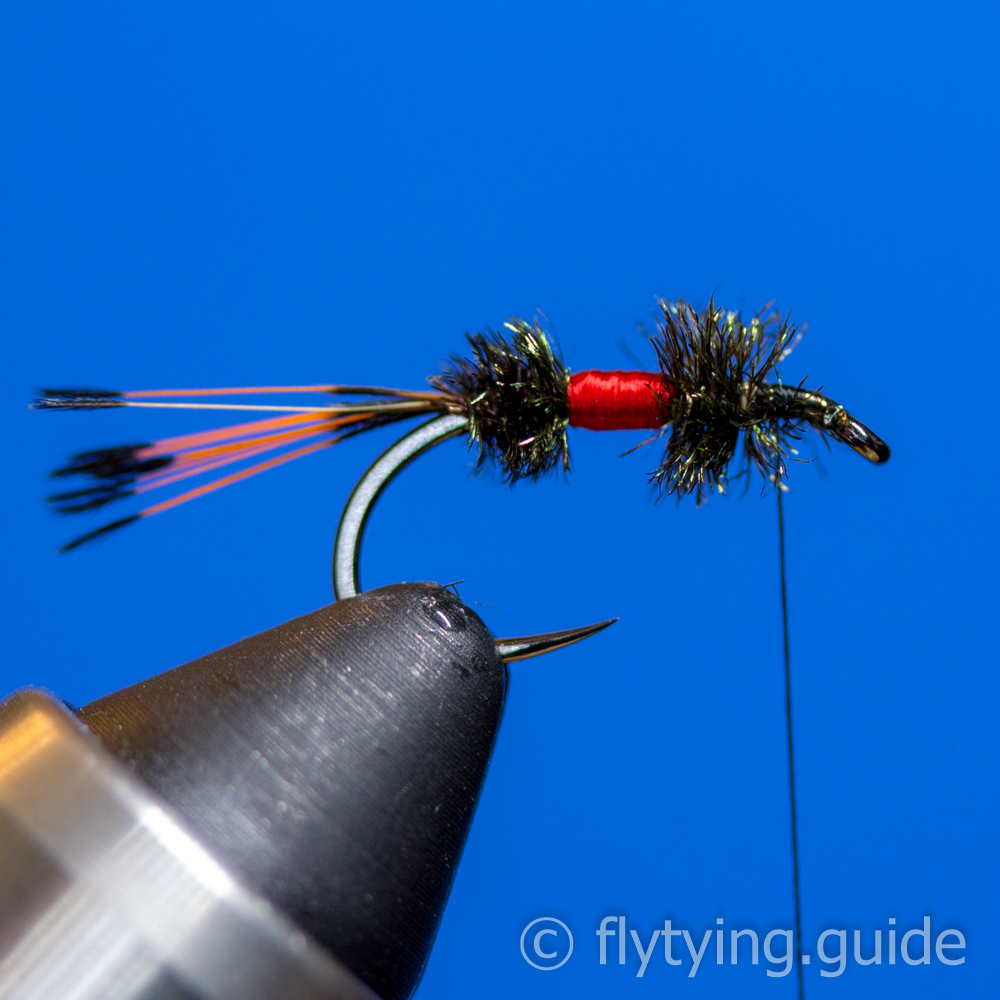
Secure one or two peacock herls by their tips at the start of the bend. Cover the butt ends and remove the excess. End with the thread near the point of the hook.
4
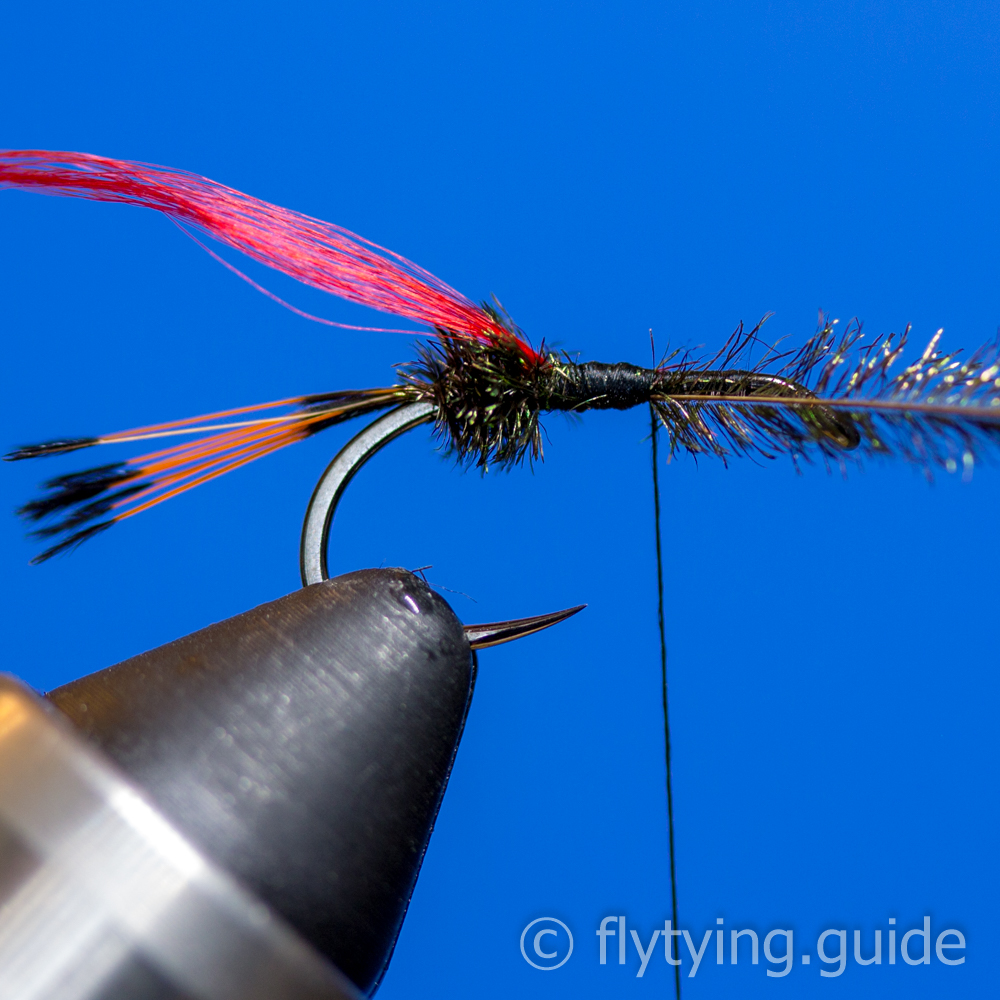
Begin forming the body by taking 4 or 5 wraps with the peacock herl until you reach the thread, secure the peacock herl near the hook point. Advance the thread the desired tag width, covering the peacock herl and forming a smooth under body in preparation for the floss. The tag length is typically a similar size as the body parts or slightly smaller. End with the thread at the tie off point of the completed body section.
5
Catch in a length of floss and cover the butt end, it might be easier to gently pull the floss until the butt ends are beneath the thread instead of trimming the excess. Secure with a few tight wraps and then advance the thread to the predetermined tag width.
6
Wrap the floss along the underbody to create the tag, secure with thread.
7
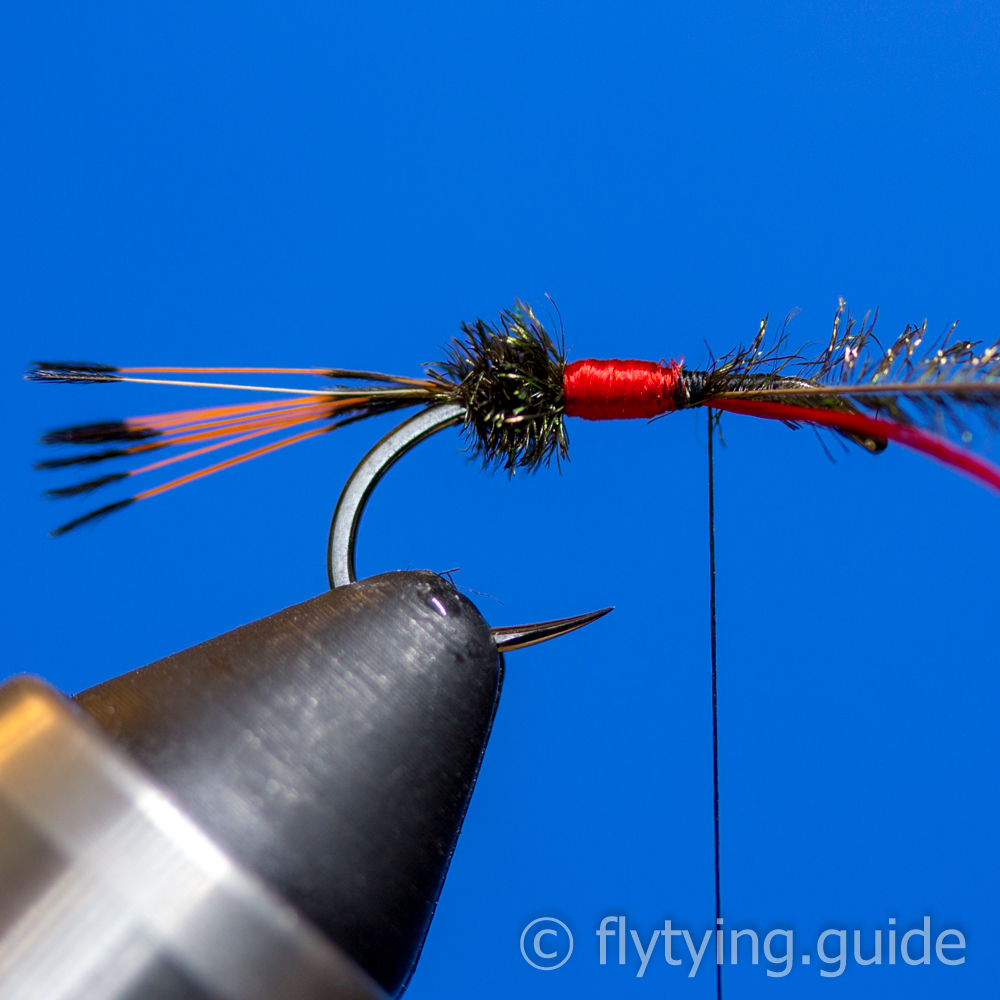
Pull the peacock herl back and finish securing the floss while also positioning the herl for the second body segment, remove the excess floss and cover the butt end.
8
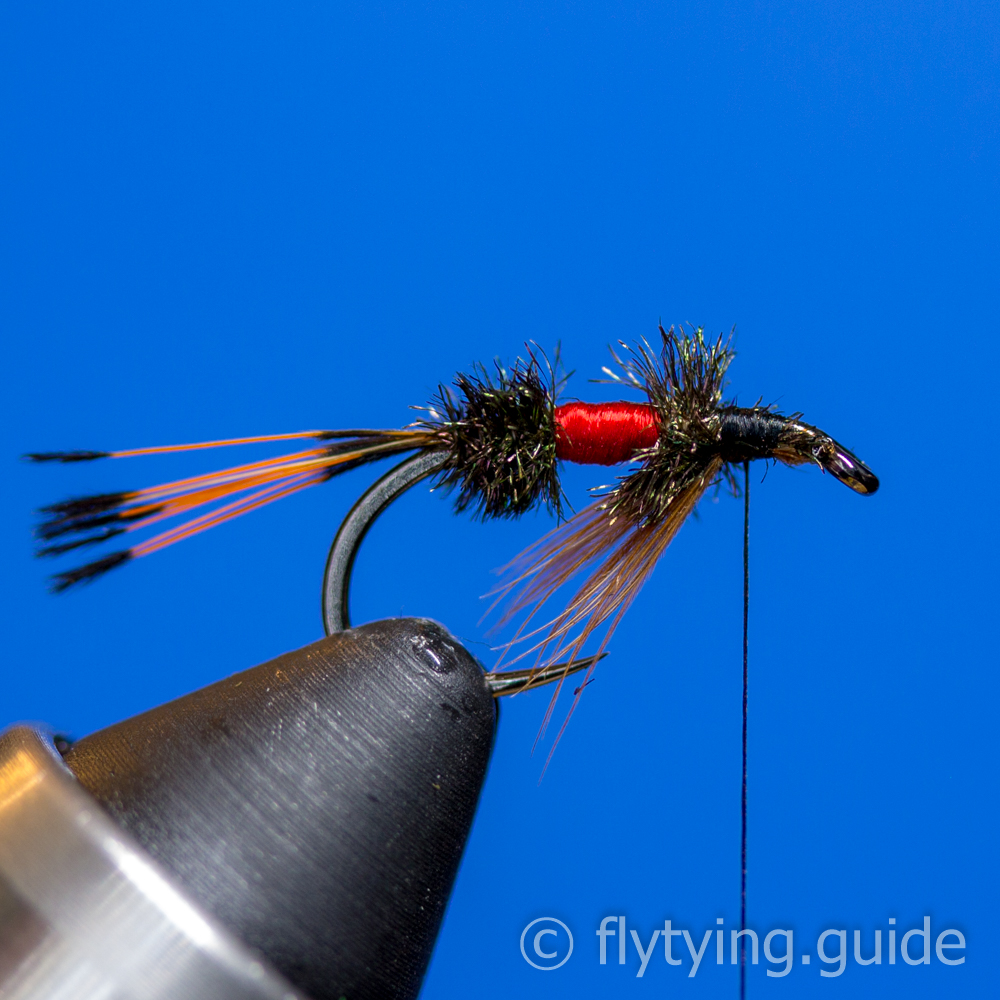
Finish the body by creating a similar sized segment in front of the tag as is behind it. Secure the herl and remove any excess.
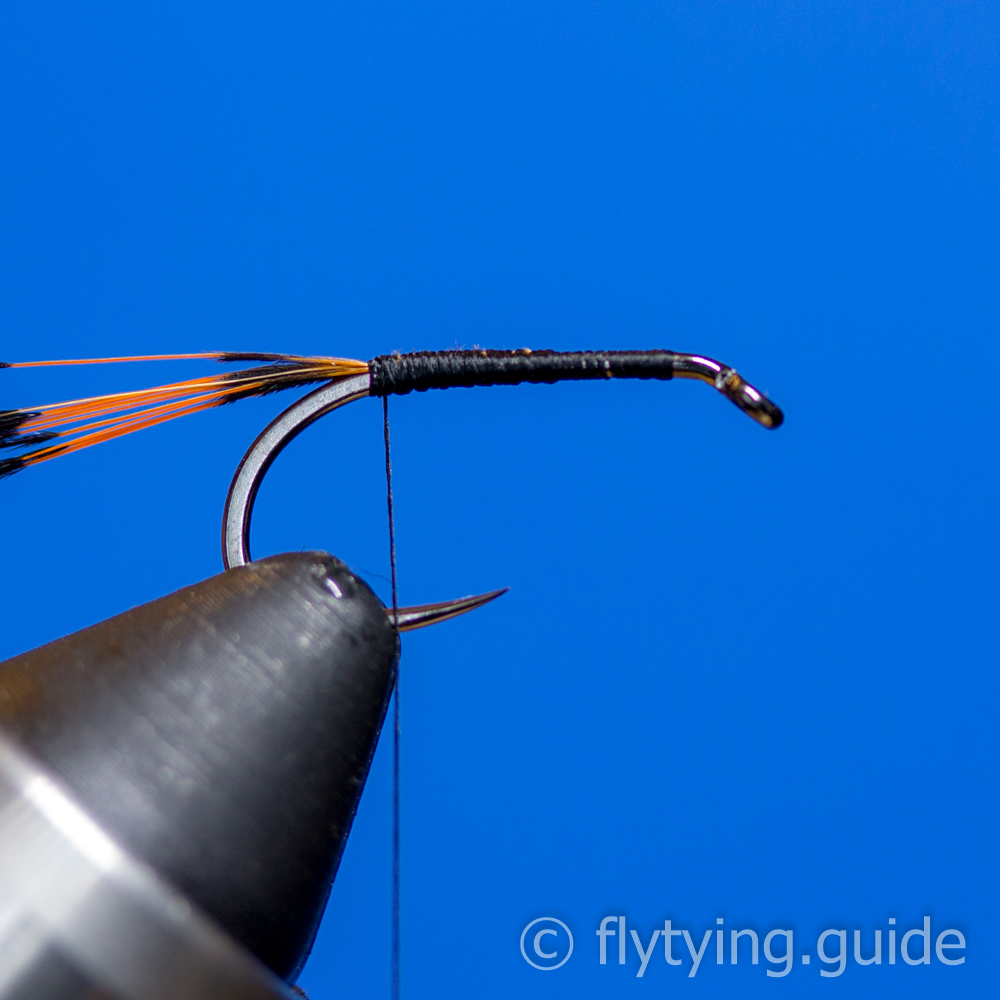
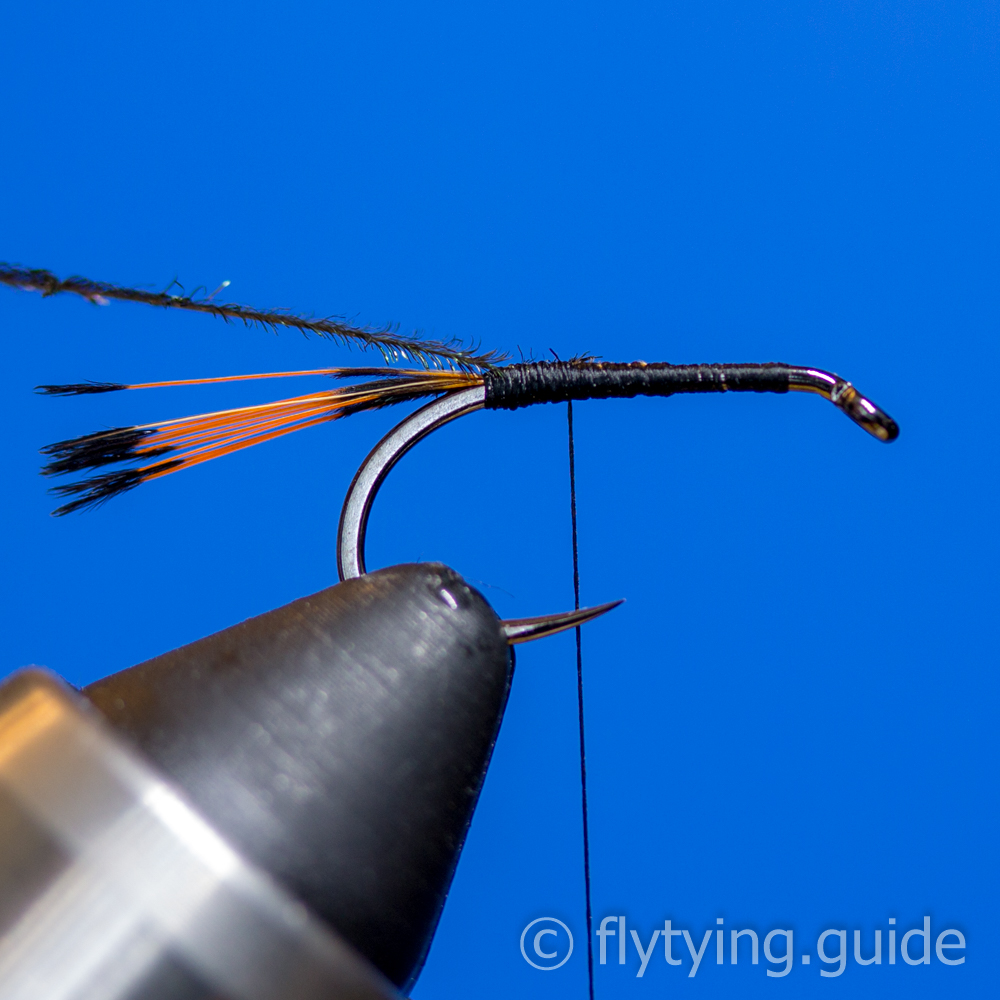
9
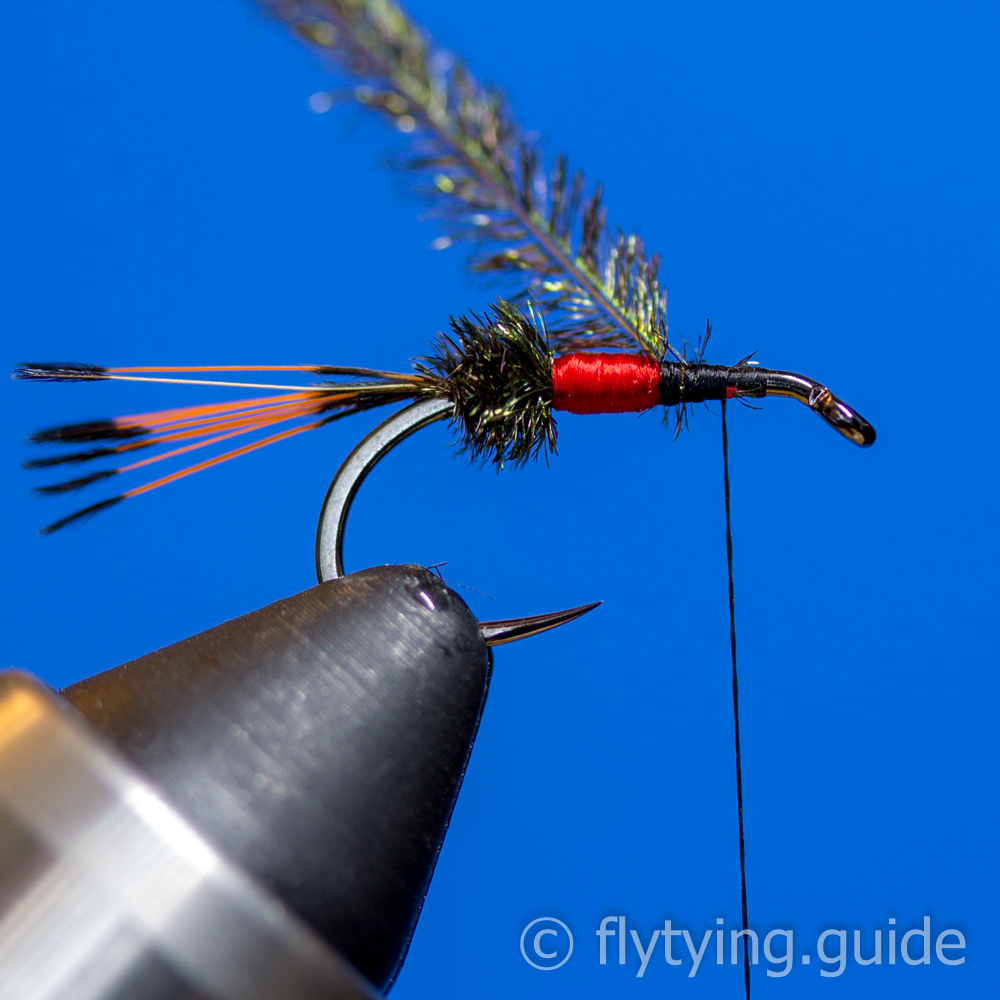
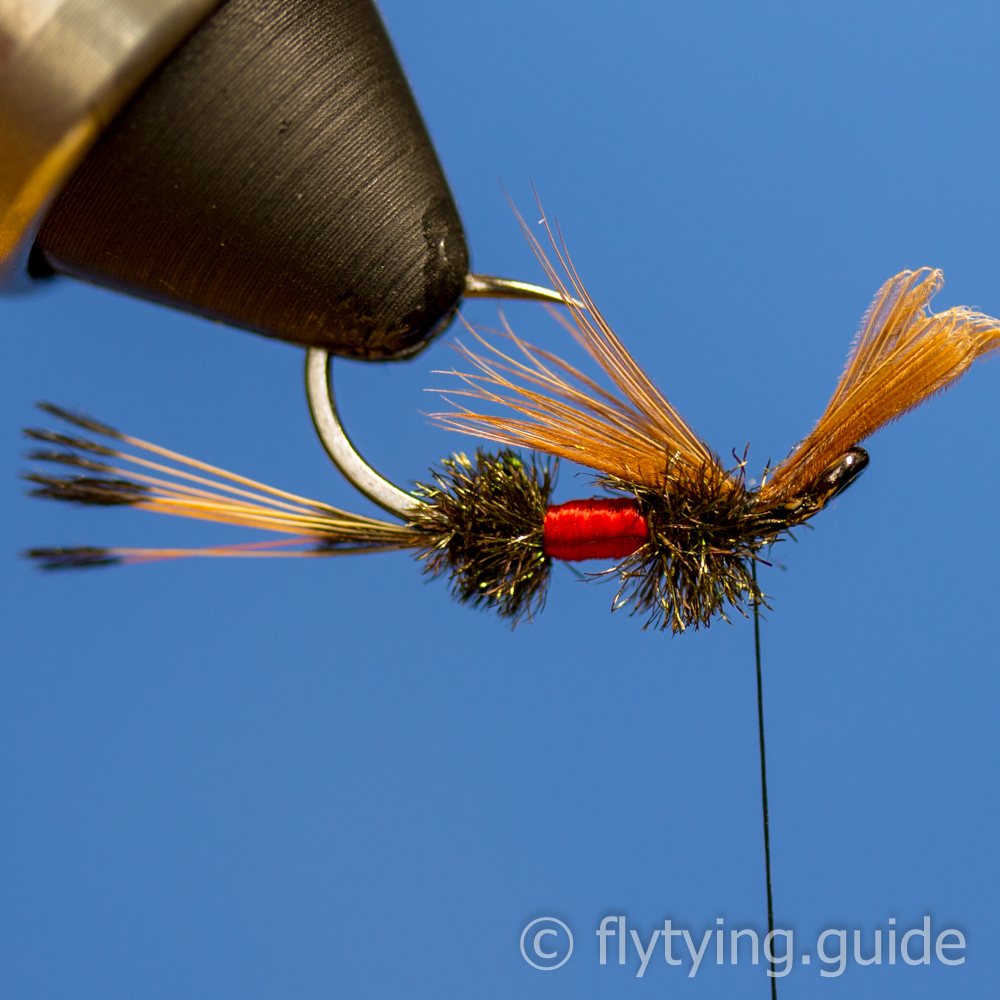
Prepare the throat hackle legs by removing a small clump of brown hackle fibers keeping their tips aligned. Measure the fibers so they are about to the hook point and secure using a pinch wrap. Alternatively you can apply a soft hackle collar if you have feathers with the appropriate fiber length.
10
Remove any excess and cover the butt ends of the throat hackle.
11
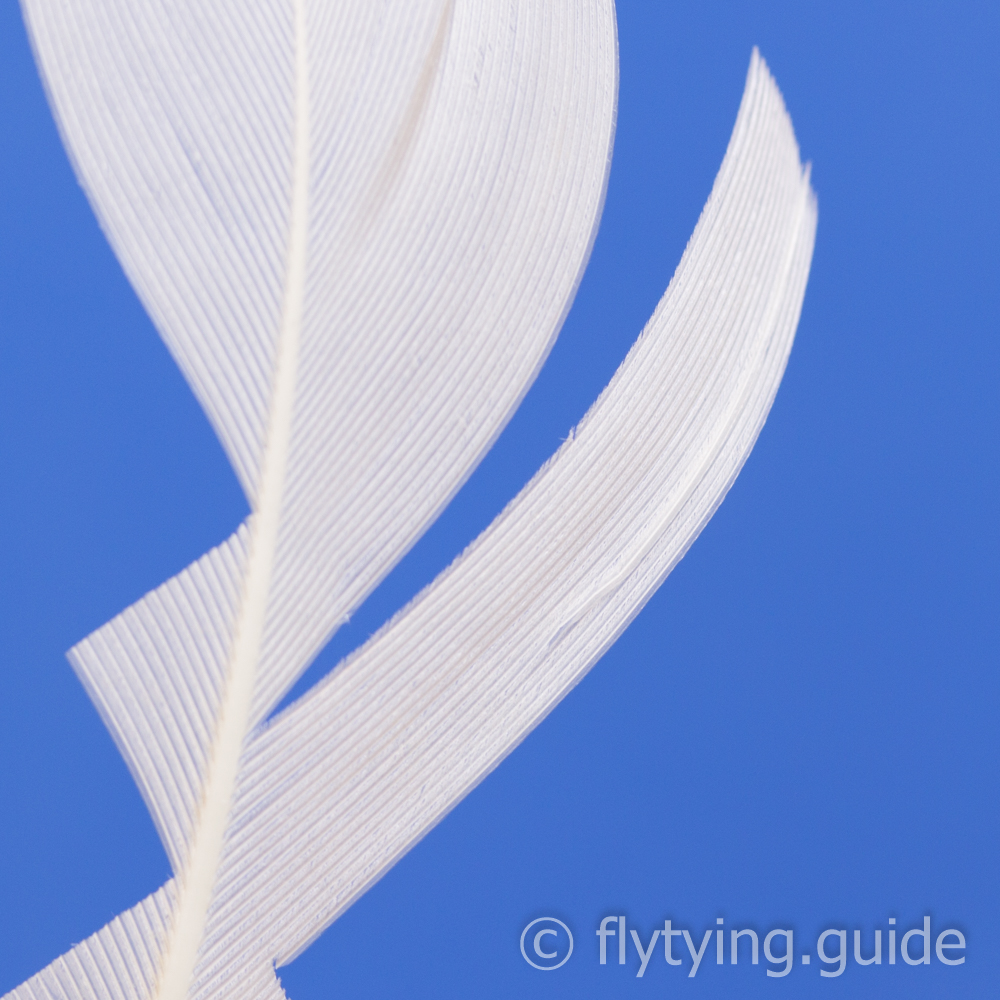
Prepare the quill slip wing by clipping two sections of wing fibers from a matched pair of duck or goose quills. The quill segments should be one hook gap in width and be long enough to extend past the bend of the hook slightly once secured.
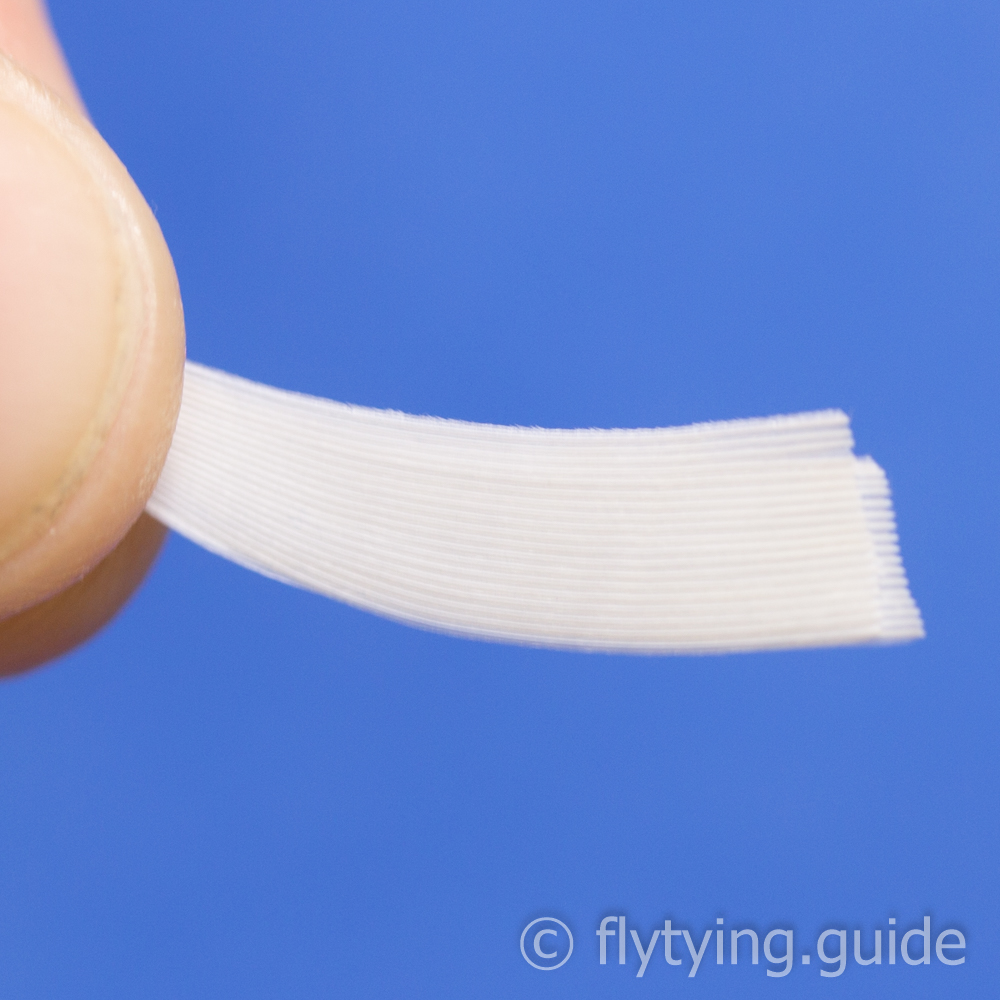
12
Align the tips of the quill slips so that they curve together, dull sides together. The tips of the quills should sweep upwards. Measure the wing so that it is the length of the entire hook, including the bend.
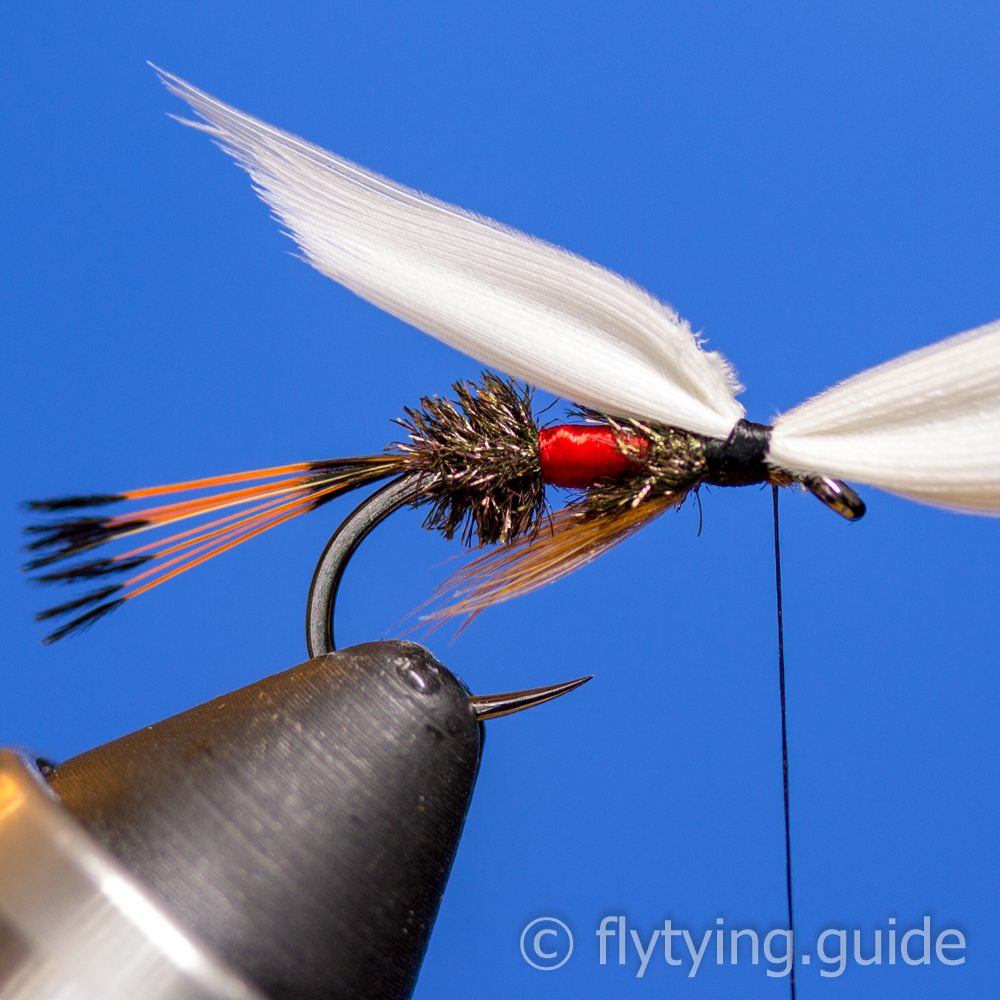
13
Position the wings on top of the hook, pinched tightly in your off hand take one pinch wrap over the fibers but do not release the pinch. Let go of the bobbin and pinch the tag ends of the wing fibers with your primary hand. While pinching both sides of the feather firmly, allow the weight of the bobbin to compress the fibers on top of the hook shank. Do not release pressure on the off hand against the fibers until the wing is secure.
14
Use your primary hand to take a couple more securing wraps in front of the initial wrap, do not take wraps behind the initial wrap or the wing will distort. Snip the excess and cover the butt ends.
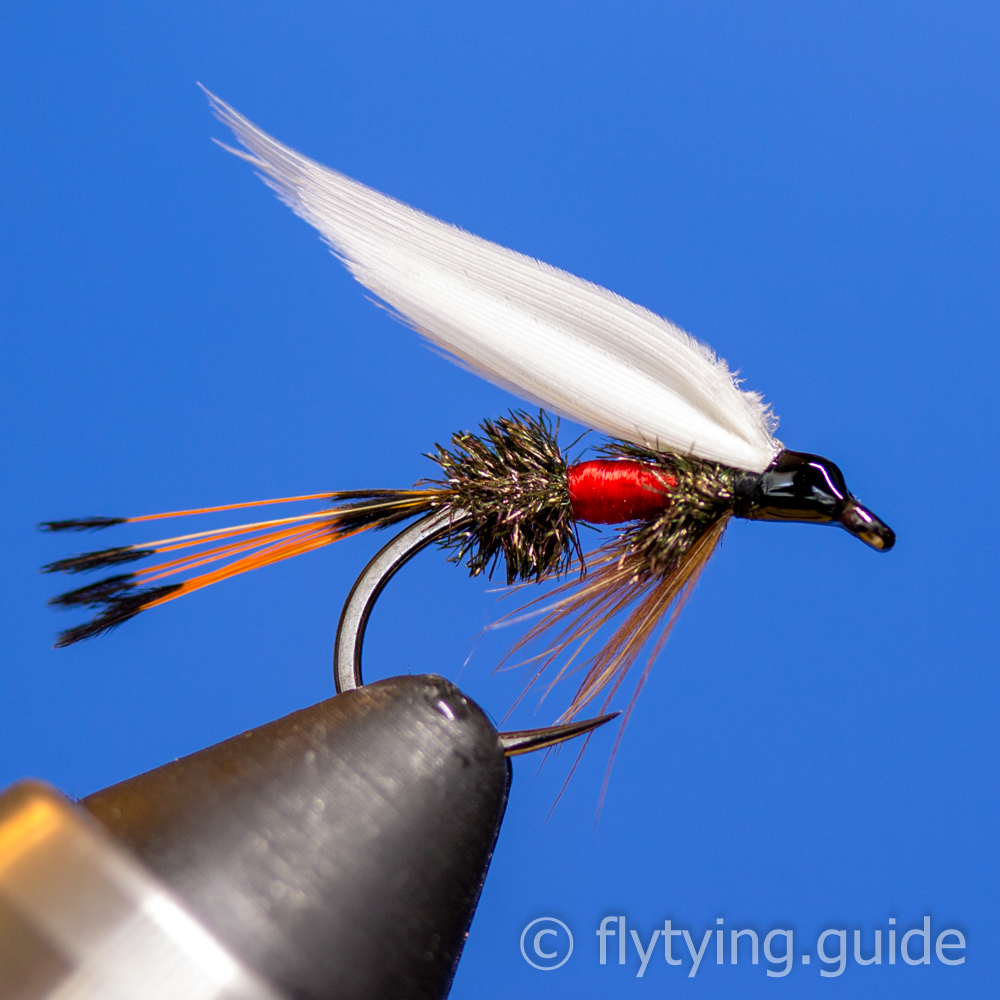
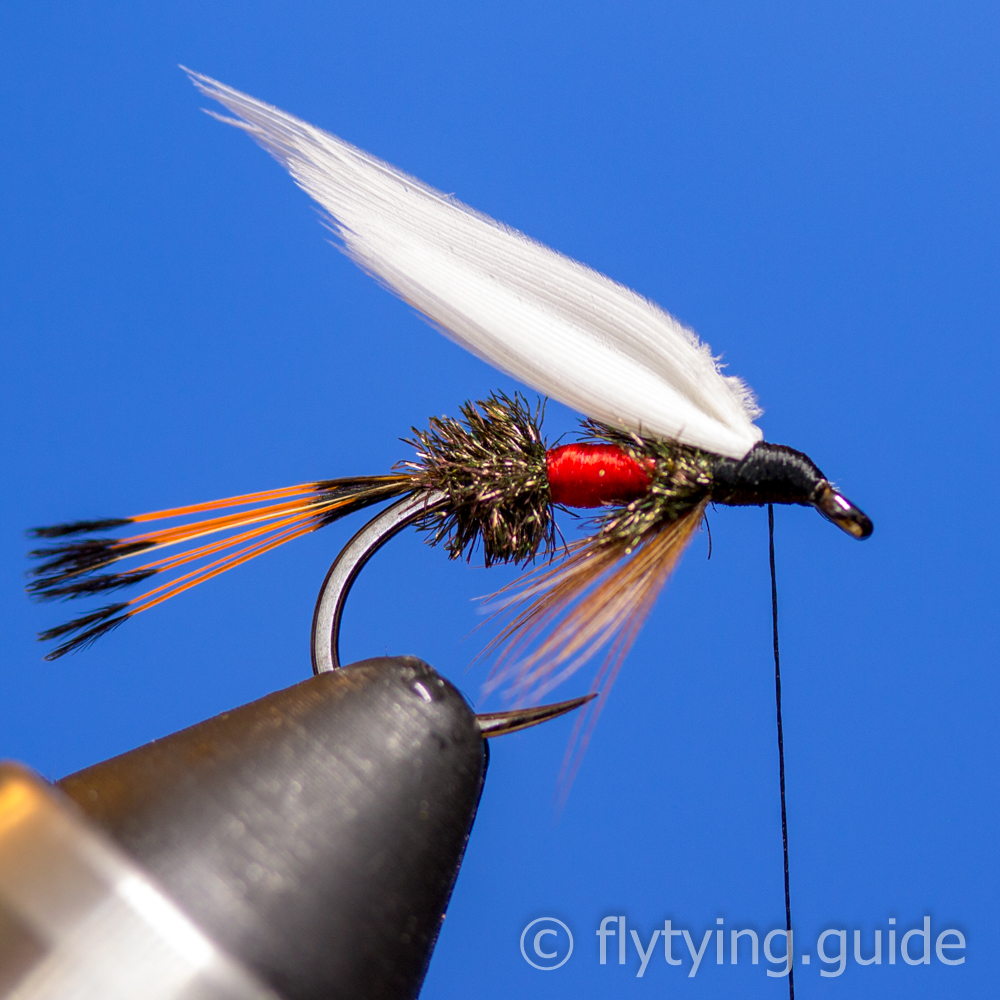
15
Whip finish and apply head cement. The Bergman flies traditionally have a prominent shiny head that helps give the flies their distinctive look.